TL;DR: I rescued a cheap CNC router from the trash to make robot art and teach people foundation CNC router skills!
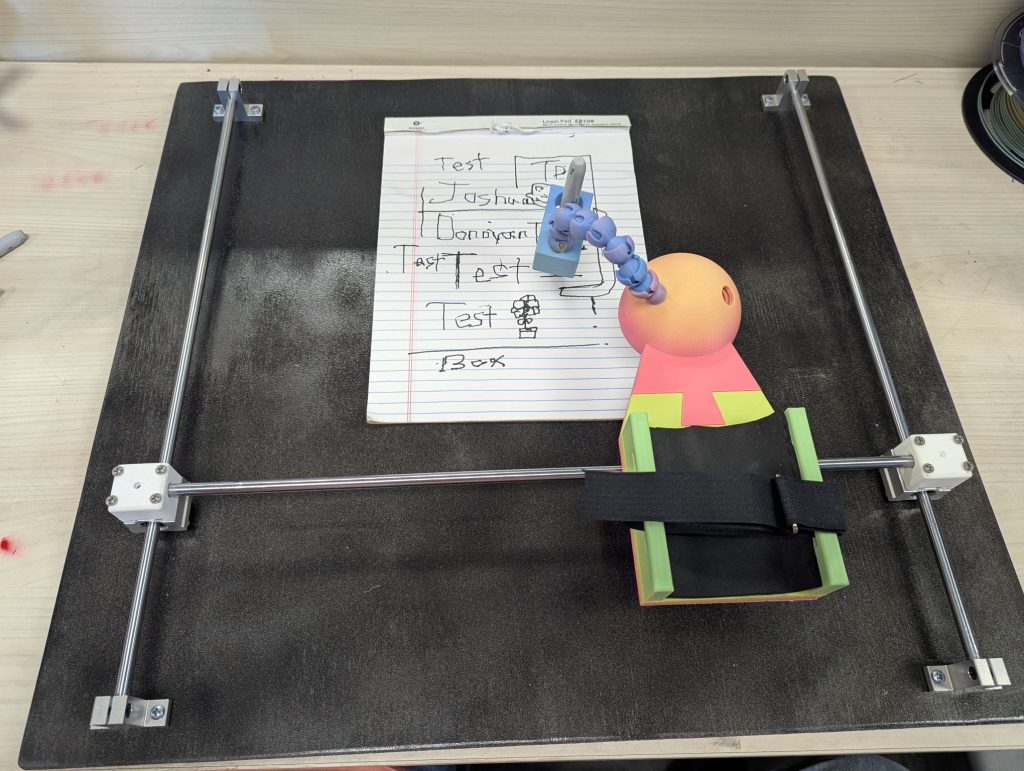
So I recently started a new job at a local science museum as a Maker Educator! We’ve been wanting to introduce guests to CNC routers, but exposing our guests to the noise, dust, and the spinning bit chewing through materials sounds like a bad idea? So what do we do? Well, my wife found two CNC routers missing parts a few years ago! They had been sitting in our basement waiting for a repair: now seemed like a great time to convert them to pen plotters!
This project relies on custom-made parts I designed myself. I also teach 3D modeling in the KC Metro area all year long! So, what if you want to learn to 3D model and print the way I do, but you don’t live near KC? Well, I got good news for you!
We will publish an online 3D modeling for 3D printing class this year: fill in this form and we will email you when the class is available!
How bad is it? Assessment and cleanup
The two CNC routers we had downstairs are the Linksprite miniCNC, and an original X-Carve from Inventables. I decided to start with the Linksprite miniCNC: it was dusty, sure, but unlike the other machine it had all its parts. I actually had heard of it before! Fellow keyboard enthusiast Kristina Panos had actually covered that little machine when she bought one a few years ago – you can read her review on Hackaday.
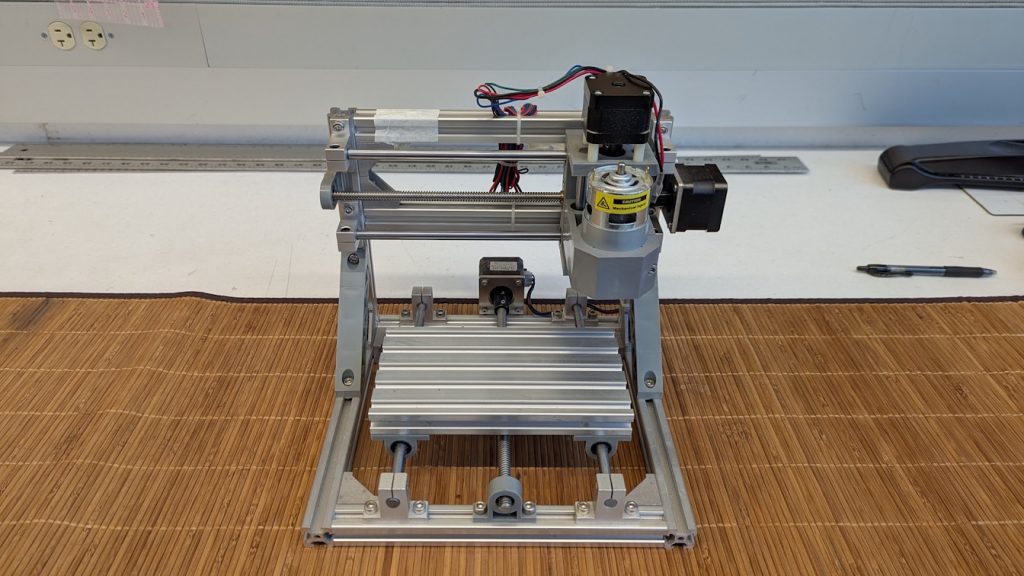
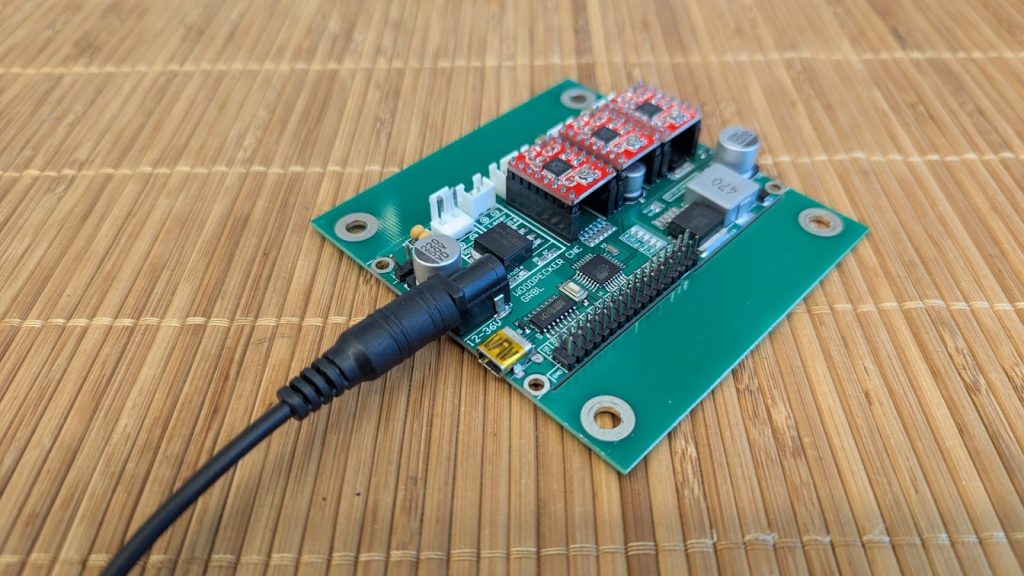
A quick test showed the controller board was still working! The original power supply was missing: I swapped the barrel plug on the board, and set a matching barrel tip on a recycled power supply before testing (and not setting anything on fire). I tested the motors next: jogging them in CandleCNC showed that they were all working, and that the board was running version 0.9 of Grbl (a firmware to control CNC machines). So far so good!
I then took the router to the Black & Veatch Makerspace for a good dusting and some fresh lubricant. Our little CNC sounded and moved much better already! It was time to start working on the conversion to a plotter.
Plotters 101
Plotters are cool. Where printers shoot ink at paper, plotters hold a pen to directly draw on paper. There is a huge following for plotters out there! #plottertwitter is a thing, Bantam Tools sells several art machines, you can find many plotters on Newegg.
What’s in a pen holder?
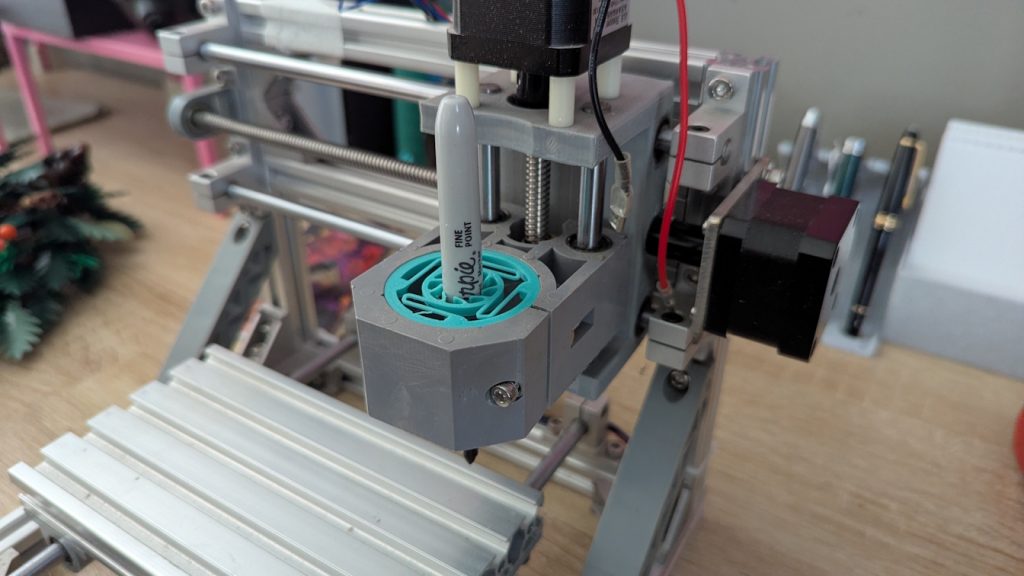
The next step was fitting a pen on the CNC router: I took out the spindle and measured the space left behind to fit a custom pen holder! Here are the features we needed:
- 3D printable, as much of it as possible. If other makers were going to mod their old Linksprite that way, I wanted them to be able to download a thing and go.
- holds a Sharpie marker. These are everywhere, relatively affordable and sometimes even cheap. They have a great ink flow with very little pressure, and they are available in a ton of colors.
- Has a little flex. Plotting on paper means having some pressure against the paper, without pressing so hard ink will bleed through.
Inspiration and current design
I am not the first nerd to look into that. Here is how other people have solved that problem already!
- The brachiograph bypasses the pen-holding problem with a clothes pin – read all about it and make your own at brachiograph.art!
- Andrew Sink’s pltr toolhead was a great inspiration – you can find it here.
- Thingiverse, Printables and other model repositories have plenty of variations for pen plotter holders, just go out there and explore!
Andrew’s design inspired me to buy a bag of random springs just in case, but in the end I settled on the print-in-place design below!
It features:
- Fins in a circular pattern in the top and bottom holders to keep the pen relatively centered in the holder
- A compliant spring to allow for some give when the pen touches the paper (I hadn’t been able to play with these in a little while!
- Another set of fins in a circular pattern in the center element to prevent the compliant spring at the top from moving down
- A no-supports design because you know how I am!
From sorting out the springs, to sorting the fins, to getting the correct measurements to effectively a Sharpie marker and finessing the whole spring system took about an afternoon and four different versions.
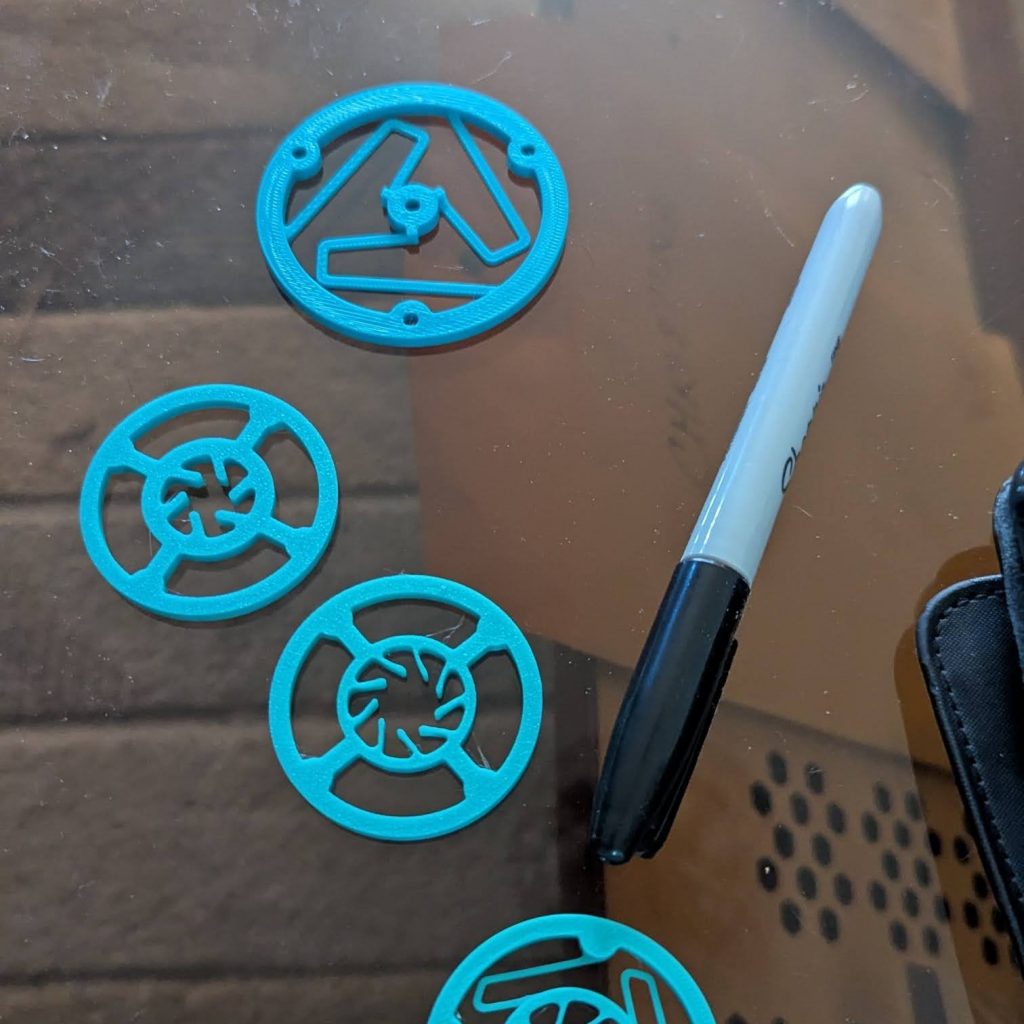
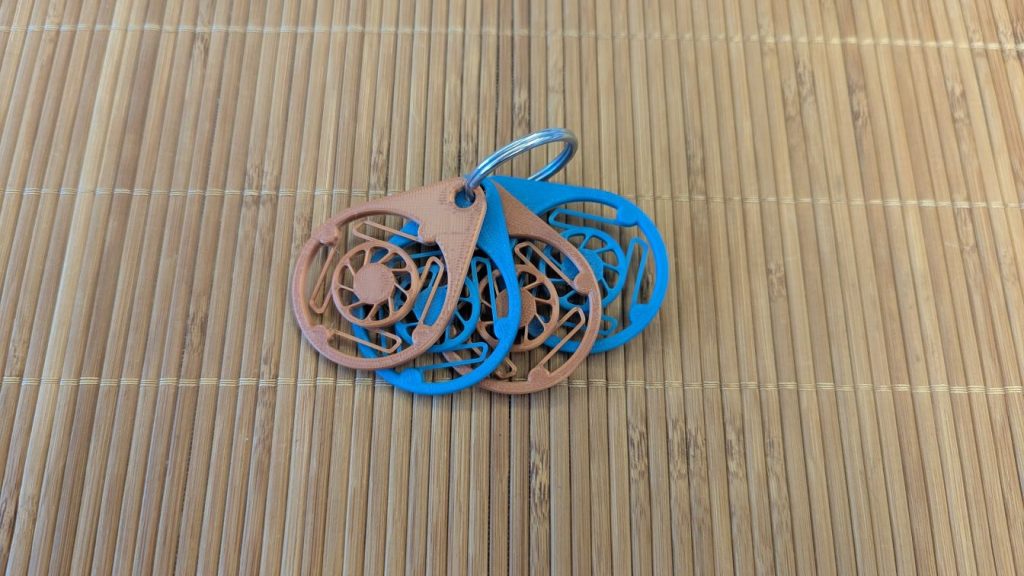
Download your pen holder (and keychain!) here!
You can download the Sharpie holder from Cults: print it in PLA (works great!) or PETG (might last longer!) at 0.12mm resolution. Start slower until it clears the springs and pen-holding fins, then back to regular speed! Here’s what the setup looks like once installed in the router.
You’ve been reading for so long, you deserve a reward! Go and download this free keychain charm on Cults: it will hold your keys, it’s fun to fidget with, and you can print it to make sure your 3D printer can actually tackle the springs and fins of the pen holding system.
Prepping robot art (are we there yet?)
OK, so we have a working robot that holds a pen.

That’s progress! Now let’s go on to the actually hard part: prepping art for plotting. For that, we need to understand the four very different steps we’re actually talking about!
- Draw something to plot in a vector design program
- Optimize that vector drawing for a plotter
- Take that optimized vector drawing and turn it into plotter instructions, and
- Plot your drawing!
Drawing something (and software recommendations)
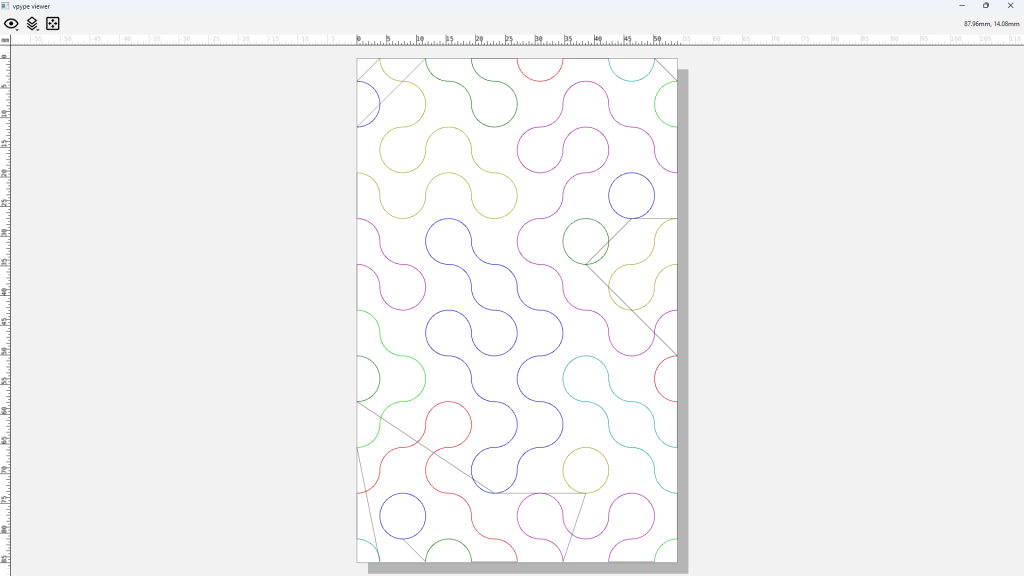
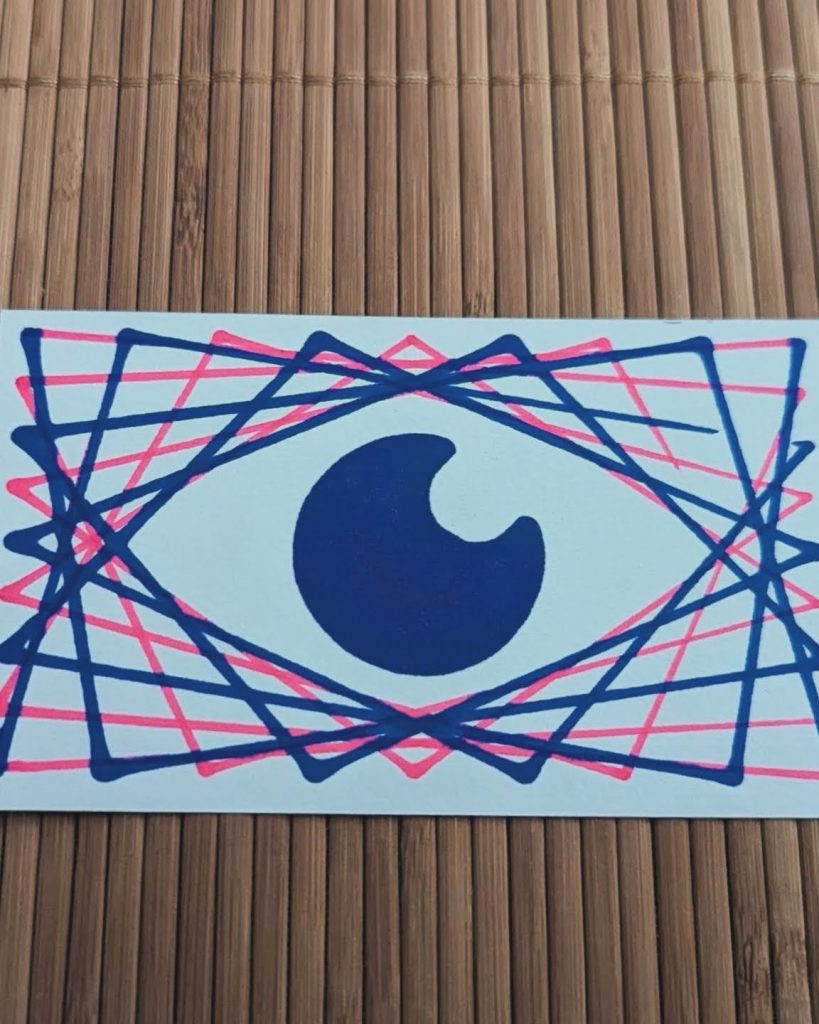
Drawing something to plot in a vector design program is relatively simple. Fire up your favorite vector design tool (Inkscape still is my favorite, but Adobe Illustrator is well-loved by many and Figma is so hot right now) and draw something! I made a quick tiles pattern using ollyoid’s Inkscape extension.

Drawing optimization with vpype
Optimizing that vector drawing for a plotter is a little harder and if you’re just getting started, I would say it’s optional for now. When you’re ready, I recommend using vpype! It reduces plotting time, connects vector paths, reorganizes the order paths are printed in, and cleans them up when needed. It’s a command line tool so it might seem intimidating at first, but you can actually make the most of it very quickly with just one simple command! Here are all the things I learned about installing and running vpype on Windows:
- Create a virtual environment for
vpypedirectly in the folder where your plotter designs live.vpypeis most compatible with Python 3.10, which could be different from the Python version on your computer. Read more about virtual environments in Python and how to create them on GeeksForGeeks! - Open a command line in your design folder and install
vpypewith the commandpip install "vpype[all]". I also like to install another library calledvsketchwithpip install vsketchwhile I’m at it. Finally, test everything installed correctly withvpype random show. If some random scribbles should pop on your screen you’re good to go! - Read and show your SVG file with
vpype read "pathtoyourSVGfile.svg”show.vpypeshould read and display your design: if it didn’t work out, go through the installation instructions one step at a time! - I use this following command to optimize designs:
vpype read "pathtoyourSVGfile.svg"linemerge --tolerance 0.1mm linesort reloopwrite myoptimizedSVGfile.svg. You should find your optimized SVG file in the same folder you’ve been working in, under the name you gave it!
vpype is a very powerful tool with lots of options and extensions. If you really just want a quick way to get started, check the vpype cookbook for examples. If you have more time, go read the documentation!
Setting up robot art (aaalmost there…)
Turning that optimized vector drawing into plotter instructions is the next step. I’m using a repurposed CNC router, so we know the plotter’s controller card speaks g-code (3D printers and laser cutters use it too).
I had played around with CandleCNC before, and it’s pretty sparse. Some friends at Lightburn had recommended their sister product MillMage‘‘s release candidate. I gave it a shot and sure enough, it has been amazing! I simply followed the Example Millmage Workflow, with some specific details below:
- The Linksprite working dimensions are 180mm wide by 100mm wide and goes up to 800mm/minute on the X and Y axis, and 500mm/minute on the Z axis.
- I created a Millmage project sized for index cards: the workpiece is 122mm wide by 77mm deep and 1mm thickness. The Origin is at the bottom left of the card and the Zero point is be at the top. All my clearances are at 2mm.
- In Millmage, a fine Sharpie marker is a scribe tool with a 0.75 mm diameter, and a 90 degrees included angle. We can use the same max speeds as the Linksprite can manage for plotting.
- Finally, a Profile operation will tell our plotter where to use that Sharpie marker. The tool head will follow the vector paths of our design! Our profile will use the max speeds the Linksprite can manage with a feed rate of 800mm/minute, a plunge rate of 500mm/min. Our depth and depth pass are 0.15 mm with 50% stepover to account for lower spots.
Are you ready to actually plot something? I know I am!
We’re finally drawing something!
After following the steps of the Example Millmage Workflow this far, it was time to take things to the finish line!
I started with setting the job’s Home at the front left corner of a sacrificial card. Then I drew a test circle in Millmage with a Profile operation to it. After a successful first plot, I loaded the tiles pattern and let it rip!
The Linksprite CNC router is relatively slow so complex plots take a time. But big geometric plots can go relatively fast – especially once they have been optimized with vpype!
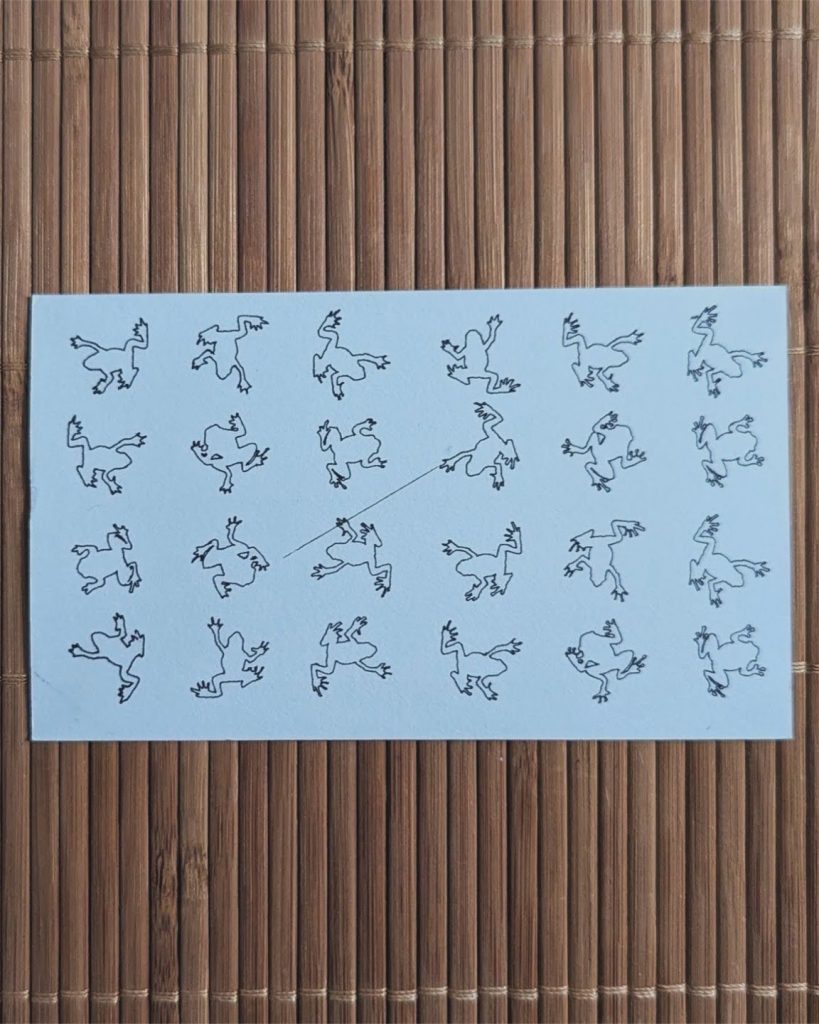
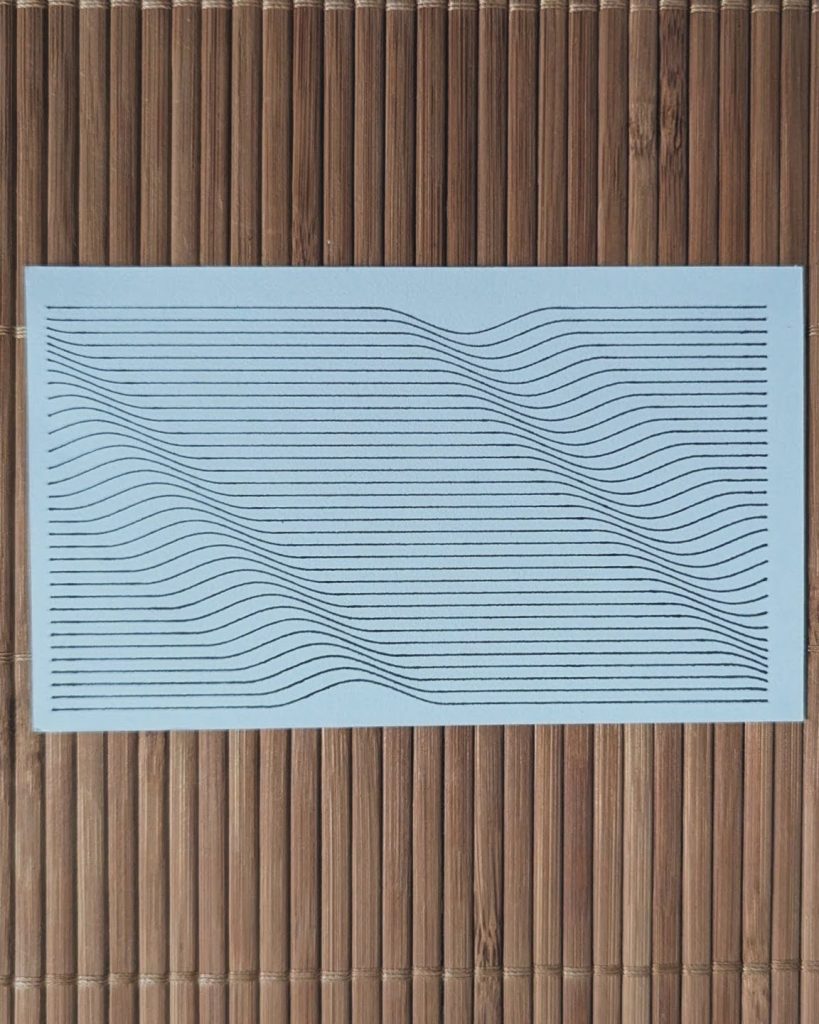
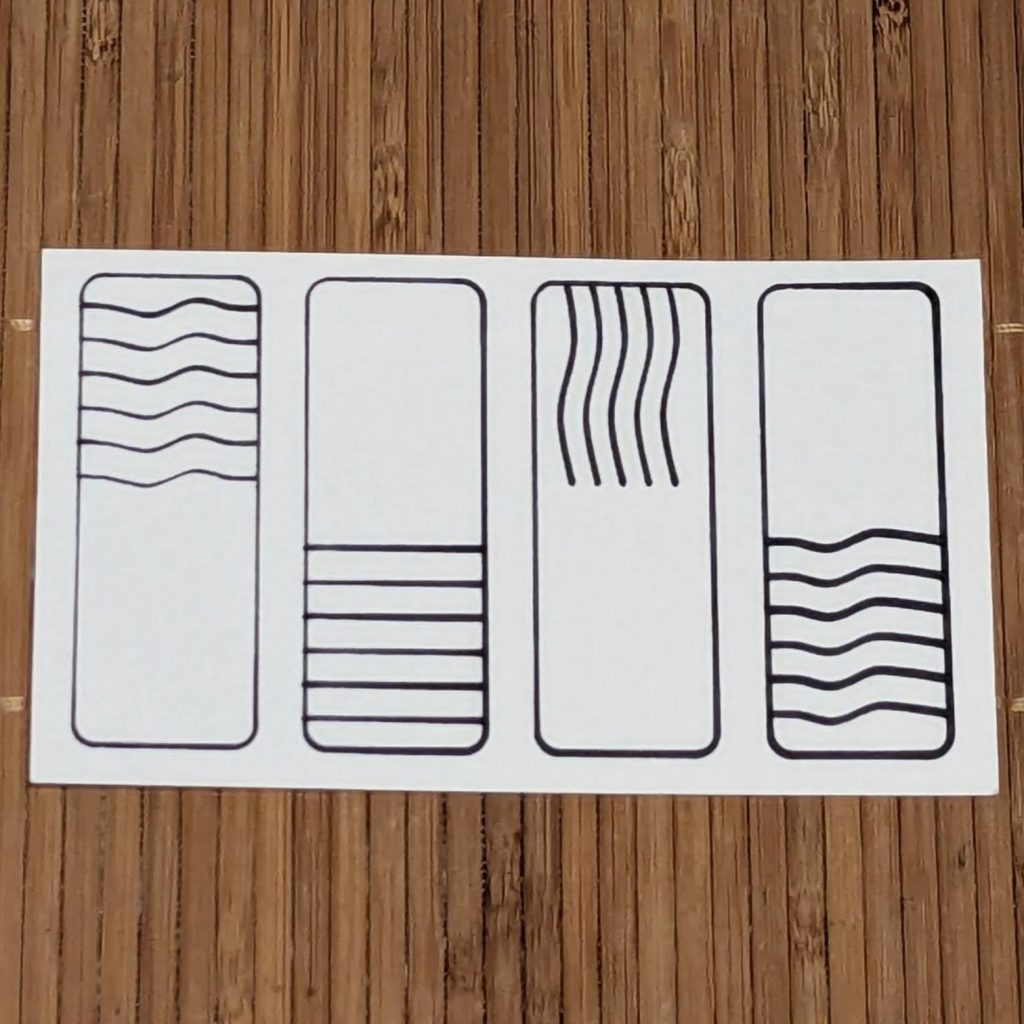
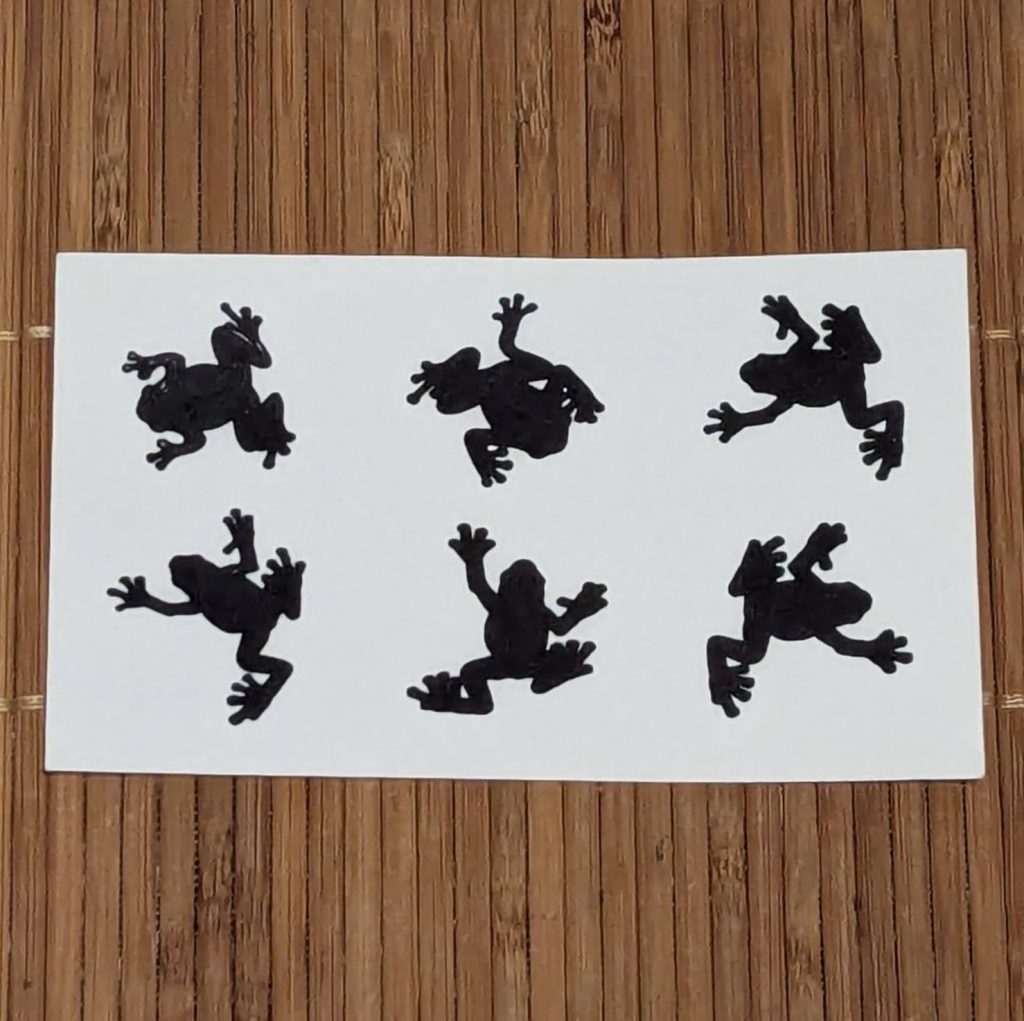
I’ve been having a lot of fun with the machine, here’s a few more examples below!
Bigger and better things with Developmental Supports
From grbl updates to custom parts, from wireless operation to limit switches, it’s a long list to take this little router to the next level! But first comes a collaboration with Johnson County Developmental Supports and Assistive Technology Specialist Joshua Donovan.
Joshua and Johnson County Developmental Supports have recently open a new lab for prototyping and manufacturing. They are interested in integrating my design in various tool holding assistive devices for clients! We’ll be working on that together for the next couple months, and I’ll be visiting their brand new design and digital manufacturing lab this coming February!