TL;DR: I needed a flexible way to generate dead air videos for a project. So I wrote a Python script for it, and learned some about argparser() along the way!
I’ve been designing a small GUI program for a portable Bluetooth printer for a little over a week now. It’s going great! But this Saturday morning, as I was putting away breakfast and getting the day started, I found that I needed a palate cleanser.
I’ve been working with Camtasia more recently, and I wanted some dead-air static for a video project. Of course, I could look it up, find some royalty-free footage maybe…But it wouldn’t give me a lot of options, would it? So instead, I decided to write a dead-air static generator, and use it as an excuse to beef up my understanding of argparse.
Argparse is a nifty little Python library: give it a set of parameters for your script, and it will ask them from your user, providing instructions on how to use your program from the command line along the way! I had seen it in action a few times, including in someone else’s code for the portable Bluetooth printer, but I wanted to learn a little more about it by myself.
I started by giving myself the parameters I wanted for my app:
- Command-line based so I could use argparse
- Asking for a width, height and duration for the amount dead-air video generated
- Giving the option of color of black and white depending on your needs
- Putting out a video file so I could use it in Camtasia (it doesn’t support GIFs)
- Using popular Python libraries so I wouldn’t have to write much from scratch.
With these in tow, I got started!
PASSION DON’T PAY THE BILLS (YET)
Gimme some money.
Making dead air
If you’ve read my post on processing images with Python, you already know I have experience with Pillow, a very popular library for graphics processing. I used that and numpy (a library dedicated to manipulating mathematical objects) to create a picture full of static as a proof of concept. How? Simple!
- We make up a new image with Pillow
- We work our way through every pixel and extract its color as a mathematical value
- We pick a random color for that pixel and put that new color value back into the image
- ???
- Continue until you’re done!

I drafted the code on my iPad with Pythonista and quickly got a successful picture out of it. From there, getting the same thing in animated form wasn’t too difficult to plan.
Making moving dead air
Videos are only moving successions of pictures, often running at 25 or 30 images or frames per second. If you know how many frames per second you want, and how many seconds of static you need, you have everything you need to generate all your required still source images! Then, you can repack all your static (:D) pictures together into a moving video one frame at a time.
numpy and Pillow could easily draw the pictures. After that, I used ffmpeg-python, a wrapper that lets Python interact with multimedia encoding software ffmpeg, to turn my bunch of static images into a dead-air video.
What‘s a wrapper?
A wrapper lets your Python script interact with another program outside of itself. In this project, ffmpeg-python doesn’t do anything on its own: instead, it wraps around the instructions in our Python script in a way so that they make sense for the ffmpeg program installed on your computer (and providing an interface between the two).
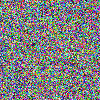
This 300×300 block of static took less than 10 seconds to generate on my computer. So, I call it a win!
Snags and lessons
Don’t imagine it’s all been fun and roses: I have had a few struggles with this script. The first one was hands down the argparse documentation. I know it has a lot of heavy lifting to do to get users started, but I found I couldn’t make sense of it because of how thorough it is. For that and a couple other things, I turned to a self-hosted LLM running on LM Studio to help break things down for me, or generate the occasional short snippet of code.
As far as lessons go, I now have a new appreciation for argparse. I’m a really big fan of its ability to map arguments directly to specific variables in your code, as well as flags states. I know I’m trying to level up my GUI game these days, but argparse will definitely be my go-to for command line tools from now on!
You can find the code for this project on Github as usual. Enjoy!