tl;dr: I made a machine that helps us give consistant, reliable information to patrons at work even at our busiest – with cardboard, a hot glue gun, a Raspberry Pi and a dream!
Our MakerSpace sees as many people in a day, as a small library location does on its own. Every new days is a wild ride! With only a few of us to run the space full time – along with support from our MakerSpace Public Service Team colleagues – it can be difficult to be present for new patrons discovering the space when the shop is already full of people needing help!
So what did we do? Well…We made an informational little cardboard machine of course!
The concept
The idea was to have a reliable machine that would look like something fun and approachable to poke at. The MakerSpace is a very utilitarian space with not a lot of colors: to contrast with that, I settled on a design inspired by Googie architecture, and big colorful switches as a shout out to my love for blinking, beeping and buzzing arcades!
I only made a couple of design prototypes for this project – it was mostly about dialing things back rather than making it a bigger and bolder design: that helped not to complicate the cardboard structure and make the parts fit in the laser cutter’s cutting envelope. For example, the big marquee on the side that would have spelled “MakerSpace” is gone, and the big chunky triangle at the top transformed a lean sign hosting a call to discovery and experimentation!
Everything else gelled relatively quickly: the general size of the machine was helpfully constrained by our desk space, the font for the marquee and buttons has a glorious space age vibe and the material – well, people always love to see cardboard do things cardboard usually wouldn’t do!
Electronics and software
Now that part took longer. I had originally picked the Pi Pico microcontroller as a very low-energy solution for this build, but ultimately couldn’t find a way to print the graphics needed using ports of Adafruit’s thermal printer library for Circuit Python: nothing that couldn’t be handled by the Pi 3’s USB ports and a prototyping hat. With the electronics sorted that way it was time to turn to the code! Except…
The trusty wiringpi library that historically let hackers and tinkerers hook up their Pi 3’s to switches and sensors over GPIO was no more due to abuse from manufacturer. This sent me down a deep rabbit hole to figure out how to get what I wanted with a bash script…Until I found out about a replacement called gpiozero.
Things were relatively straightforward from there: one big loop listening in on button presses, a set of actions for printing out a specific document tied to a specific button press, and we were off to the races: since the thermal printer is a USB printer, the Raspberry Pi OS recognized it automatically.
This setup allows for a lot of flexibility! Thanks to a prototyping hat on top of the Pi, and with a software structure like this, we can easily:
- update the printout machine remotely – even if it’s not hooked up to our internal WiFi, security still remains a priority and nothing beats an up-to-date operating system!
- update the content remotely – we offer new classes all the time and update our equipment as often as needed, so being able to easily change the printouts is capital!
- add new features – right now the printouts are only in English, but we are hoping to make the printouts available in new languages soon!
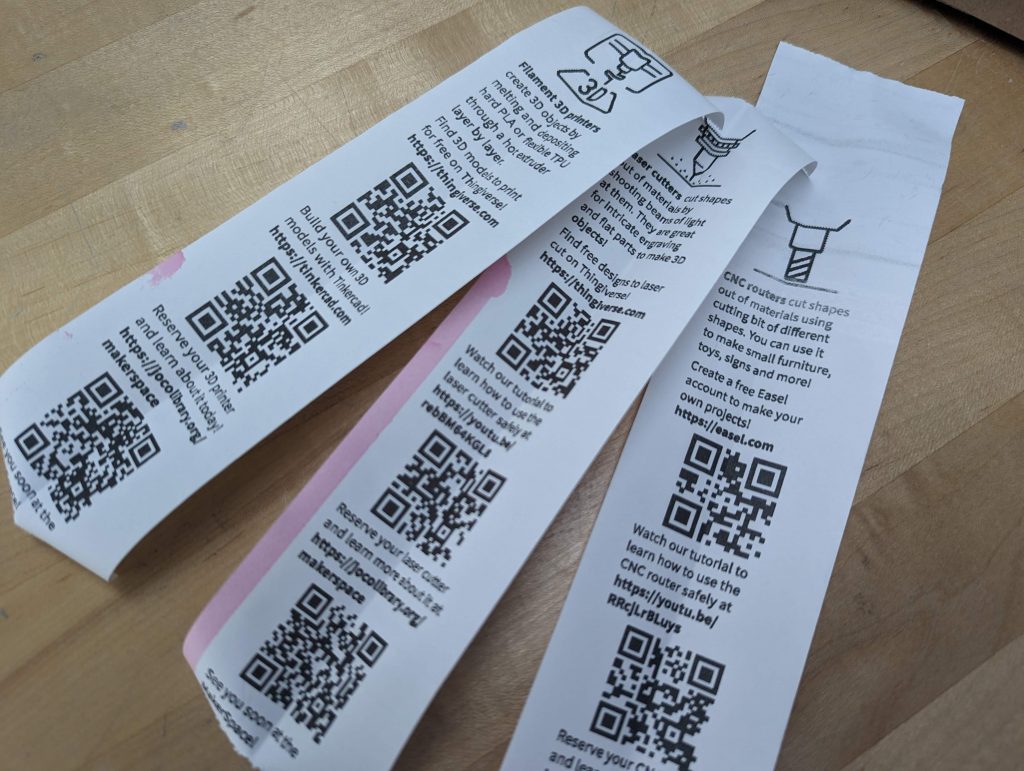
The printouts don’t just feature website URL: smartphones are much more widespread in our community than they used to be, so we also included QR codes so that people can just check all these resources straight from their phones. We use the machine every day, and it’s even more helpful now that the roster of staff supporting us has expanded! Even if the staff members running the shop are not as experienced as others, info and resources for anybody who just walked through the door are only a push of a button away!